转载自:用GitHub Actions 自动化发布Hexo网站到GitHub Pages - 掘金

之前我已经习惯了自己在本地部署 Hexo 并 push,也写过一个一键 push 到博客部署仓库和博客仓库的 shell 脚本,如下:

1
2
3
4
5
6
7
8
9
10
11
12
13
14
15
16
17
18
#!/bin/bash

echo
echo pushing to lyh543/lyh543.github.io.backup
echo

git add --all
git commit -m "update on $(date +%c)"
git push origin

# 当存在任意参数,如调用时使用 `./hexop 1` 时,则不会 push 到博客部署仓库
if [ -z $1 ]; then
echo
echo pushing to lyh543/lyh543.github.io
echo

hexo d -g
fi

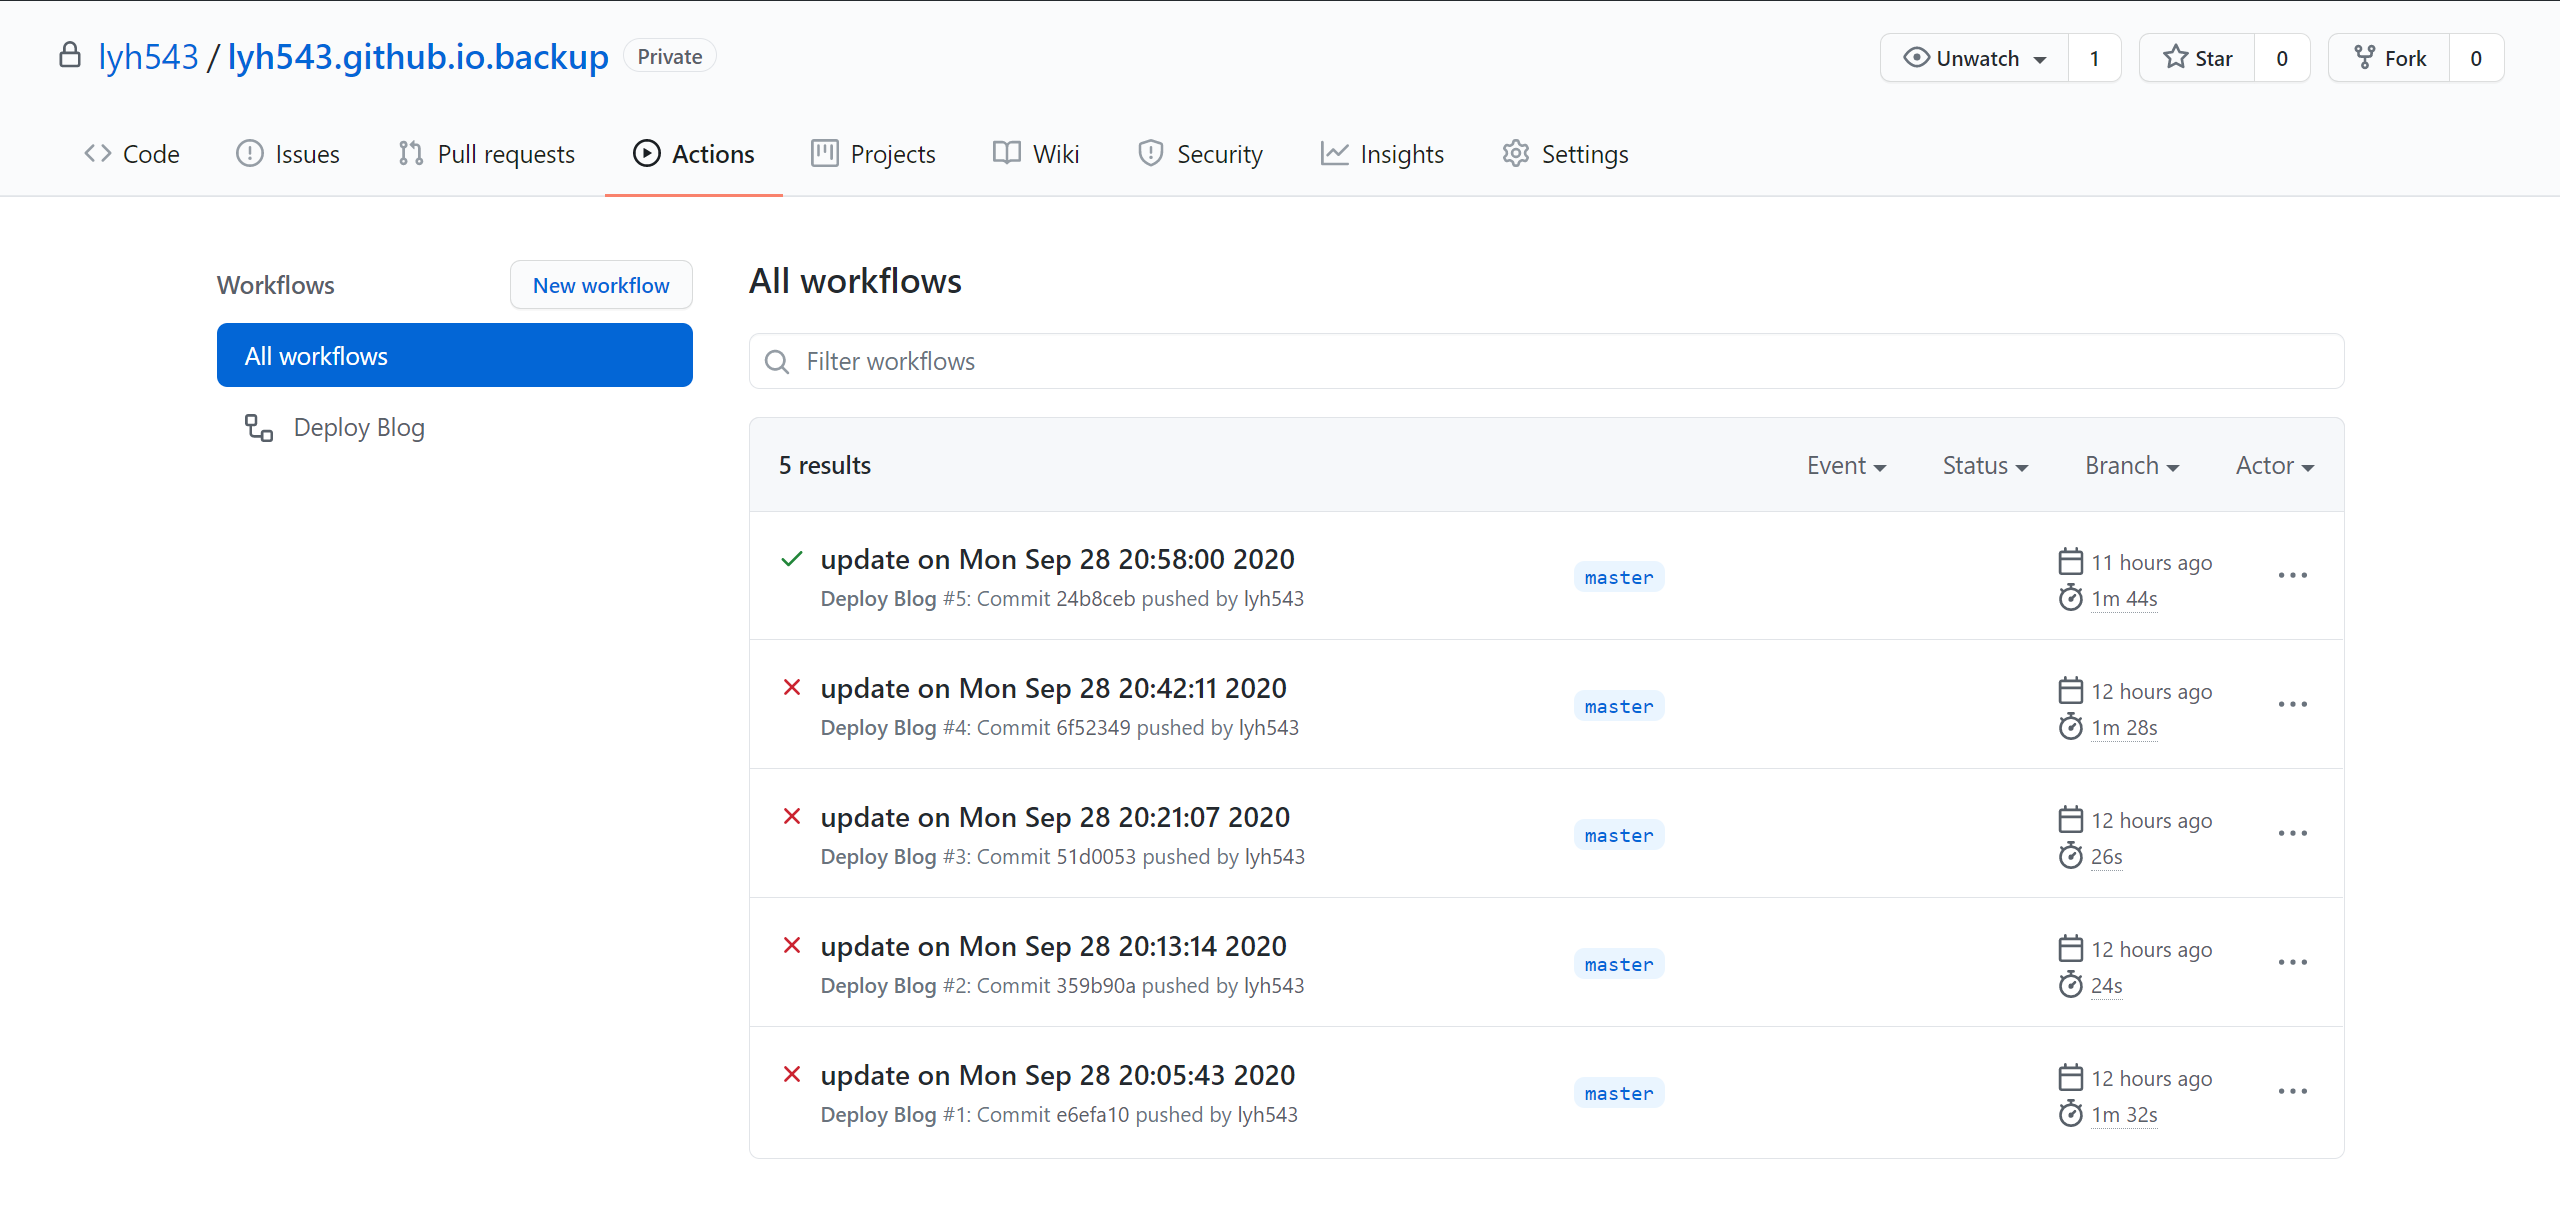
一直这么用着,也没有觉得比 GitHub Actions 麻烦很多,直到当我有同时在笔记本和台式上写博客的需求。deploy 到 GitHub 过程中,如果此次部署的电脑和上次不同,会导致博客部署仓库的 Git 提交记录冲突,必须使用 forced update,导致每次都需要把所有文件重新传一份。

于是开始学习了 GitHub Actions。发现还不错。而且网上也有现有的部署 Hexo 的中文教程可用。下面转载这篇文章,并加入自己的理解。

准备 Hexo 网站

在本地建立一个 Hexo 站点,可以参考官方快速开始文档。

建立两个 GitHub 仓库,分别叫 blog(私有的,名字可自取)和 your_github_username.github.io(公有的)。前者用来存储博客源文件,后者用于存储博客部署文件。这里我选择 lyh543.github.io.backup 存储博客源文件,lyh543.github.io 存放博客部署文件。

两个仓库最终的效果
两个仓库最终的效果

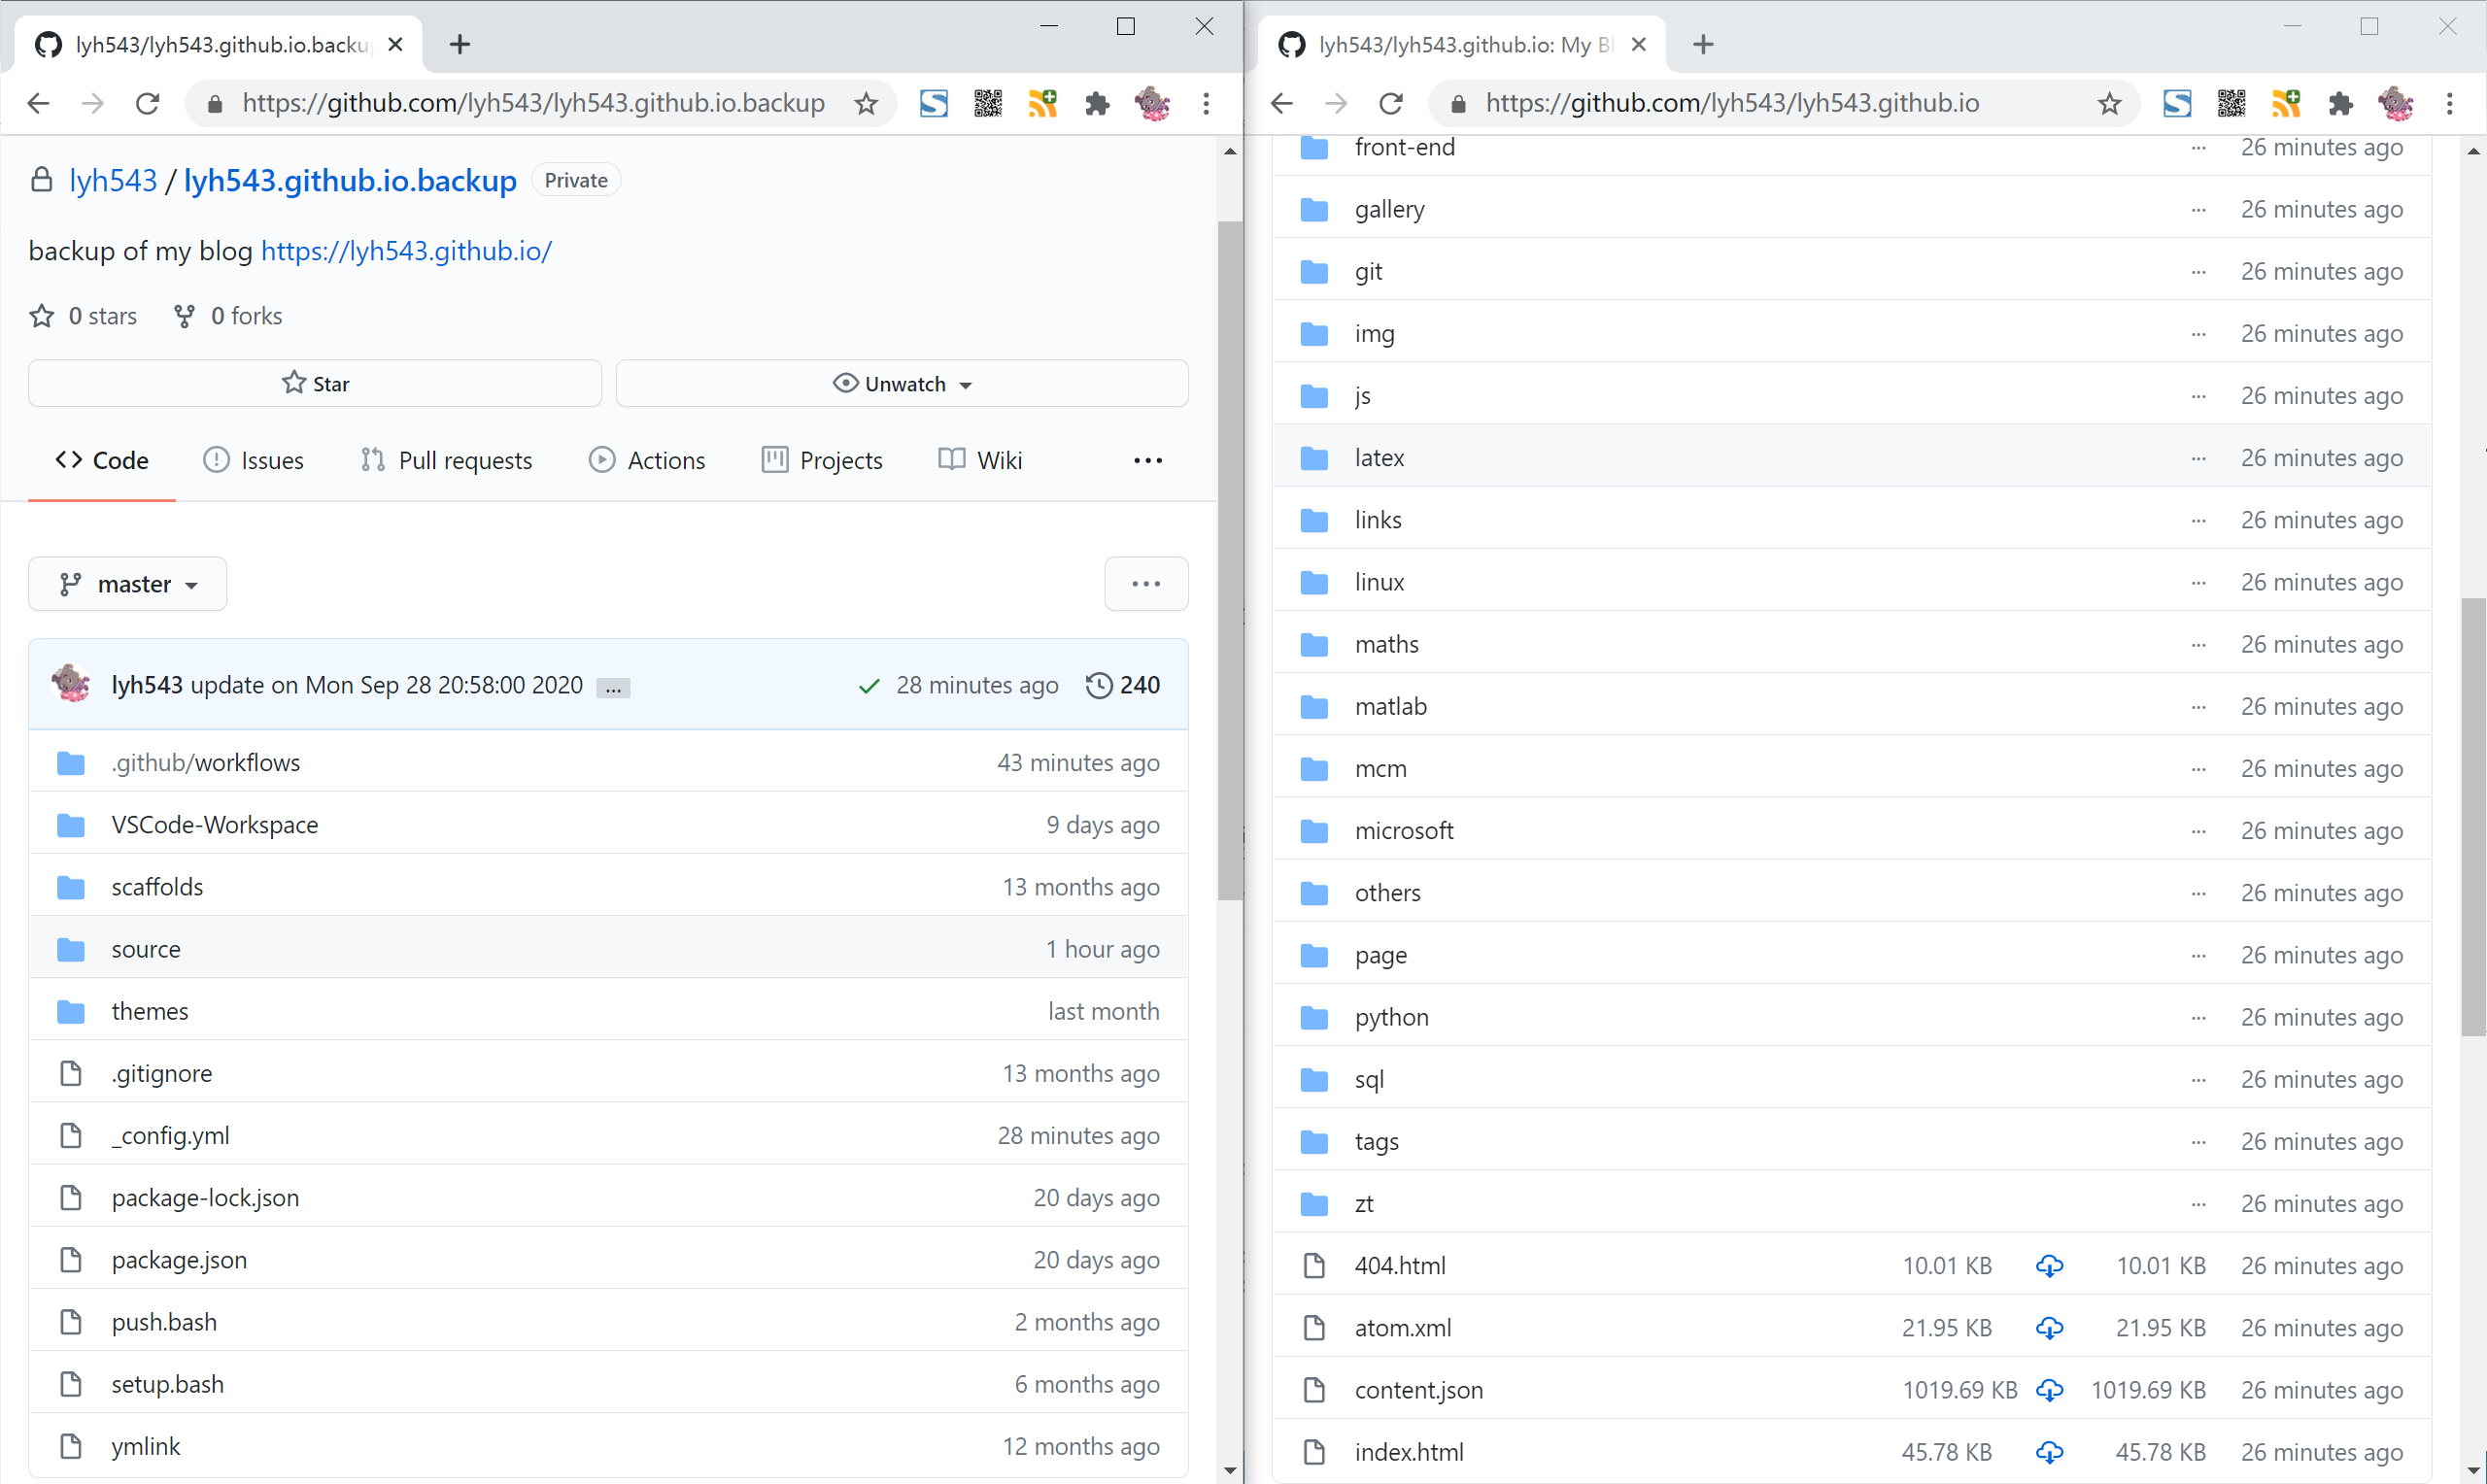
然后将本地的博客源文件推送到 lyh543.github.io.backup 仓库。

准备 SSH 秘钥

为了方便运行 GitHub Actions 时登录 GitHub 账号,我们使用 SSH 方式登录。

在本地使用 ssh-keygen 生成一组公私秘钥对:

1
ssh-keygen -t rsa -b 4096 -f ~/.ssh/github-actions-deploy

生成了公钥 ~/.ssh/github-actions-deploy.pub 和私钥 ~/.ssh/github-actions-deploy

在 GitHub 的 Settings->SSH and GPG keys 添加刚刚生成的公钥,名称随意。

lyh543.github.io 仓库的 Settings->Secrets 里添加刚刚生成的私钥,名称为 ACTION_DEPLOY_KEY

如果在 Hexo deploy 过程中还需要 sftp 部署到服务器,则还需要在服务器添加私钥:在本地执行 ssh-copy-id -i ~/.ssh/github-actions-deploy.pub root@you-server-ip.com

设置 Hexo 的部署配置

_config.yml 添加部署配置:

1
2
3
4
5
6
7
8
9
10
11
12
13
14
15
16
17
# Deployment
## Docs: https://hexo.io/docs/deployment.html
deploy:
- type: git
repo:
github: git@github.com:lyh543/lyh543.github.io.git
branch: master
# 如果有 sftp 部署到服务器的需求,则可将下面的部分取消注释
# - type: sftp
# host: your-server-ip.com
# user: root
# # pass: <password>
# remotePath: /var/www/html/blog
# port: 22
# privateKey: /home/runner/.ssh/id_rsa # runner 是 GitHub Actions 的 username(这里不能使用 ~ 代替 /home/runner)
# # passphrase: [passphrase]
# # agent: [path/to/agent/socket]

配置 GitHub Actions

lyh543.github.io.backup 仓库的 Actions 选项卡下点击新建 workflow,编写如下配置。

1
2
3
4
5
6
7
8
9
10
11
12
13
14
15
16
17
18
19
20
21
22
23
24
25
26
27
28
29
30
31
32
33
34
35
36
37
38
39
name: Deploy Blog

on: [push] # 当有新push时运行

jobs:
build: # 一项叫做build的任务

runs-on: ubuntu-latest # 在最新版的Ubuntu系统下运行

steps:
- name: Checkout # 将仓库内master分支的内容下载到工作目录
uses: actions/checkout@v1 # 脚本来自 https://github.com/actions/checkout

- name: Use Node.js 10.x # 配置Node环境
uses: actions/setup-node@v1 # 配置脚本来自 https://github.com/actions/setup-node
with:
node-version: "10.x"

- name: Setup Hexo env
env:
ACTION_DEPLOY_KEY: ${{ secrets.ACTION_DEPLOY_KEY }}
run: |
# set up private key for deploy
mkdir -p ~/.ssh/
echo "$ACTION_DEPLOY_KEY" | tr -d '\r' > ~/.ssh/id_rsa # 配置秘钥
chmod 600 ~/.ssh/id_rsa
ssh-keyscan github.com >> ~/.ssh/known_hosts
# ssh-keyscan your-server-ip.com >> ~/.ssh/known_hosts # 如果需要 sftp,则还需要注释掉一行
# set git infomation
git config --global user.name 'lyh543' # 换成你自己的邮箱和名字
git config --global user.email 'lxl361429916@live.com'
# install dependencies
npm i -g hexo-cli # 安装hexo
npm i

- name: Deploy
run: |
# publish
hexo generate && hexo deploy # 执行部署程序
新建 Workflow
新建 Workflow

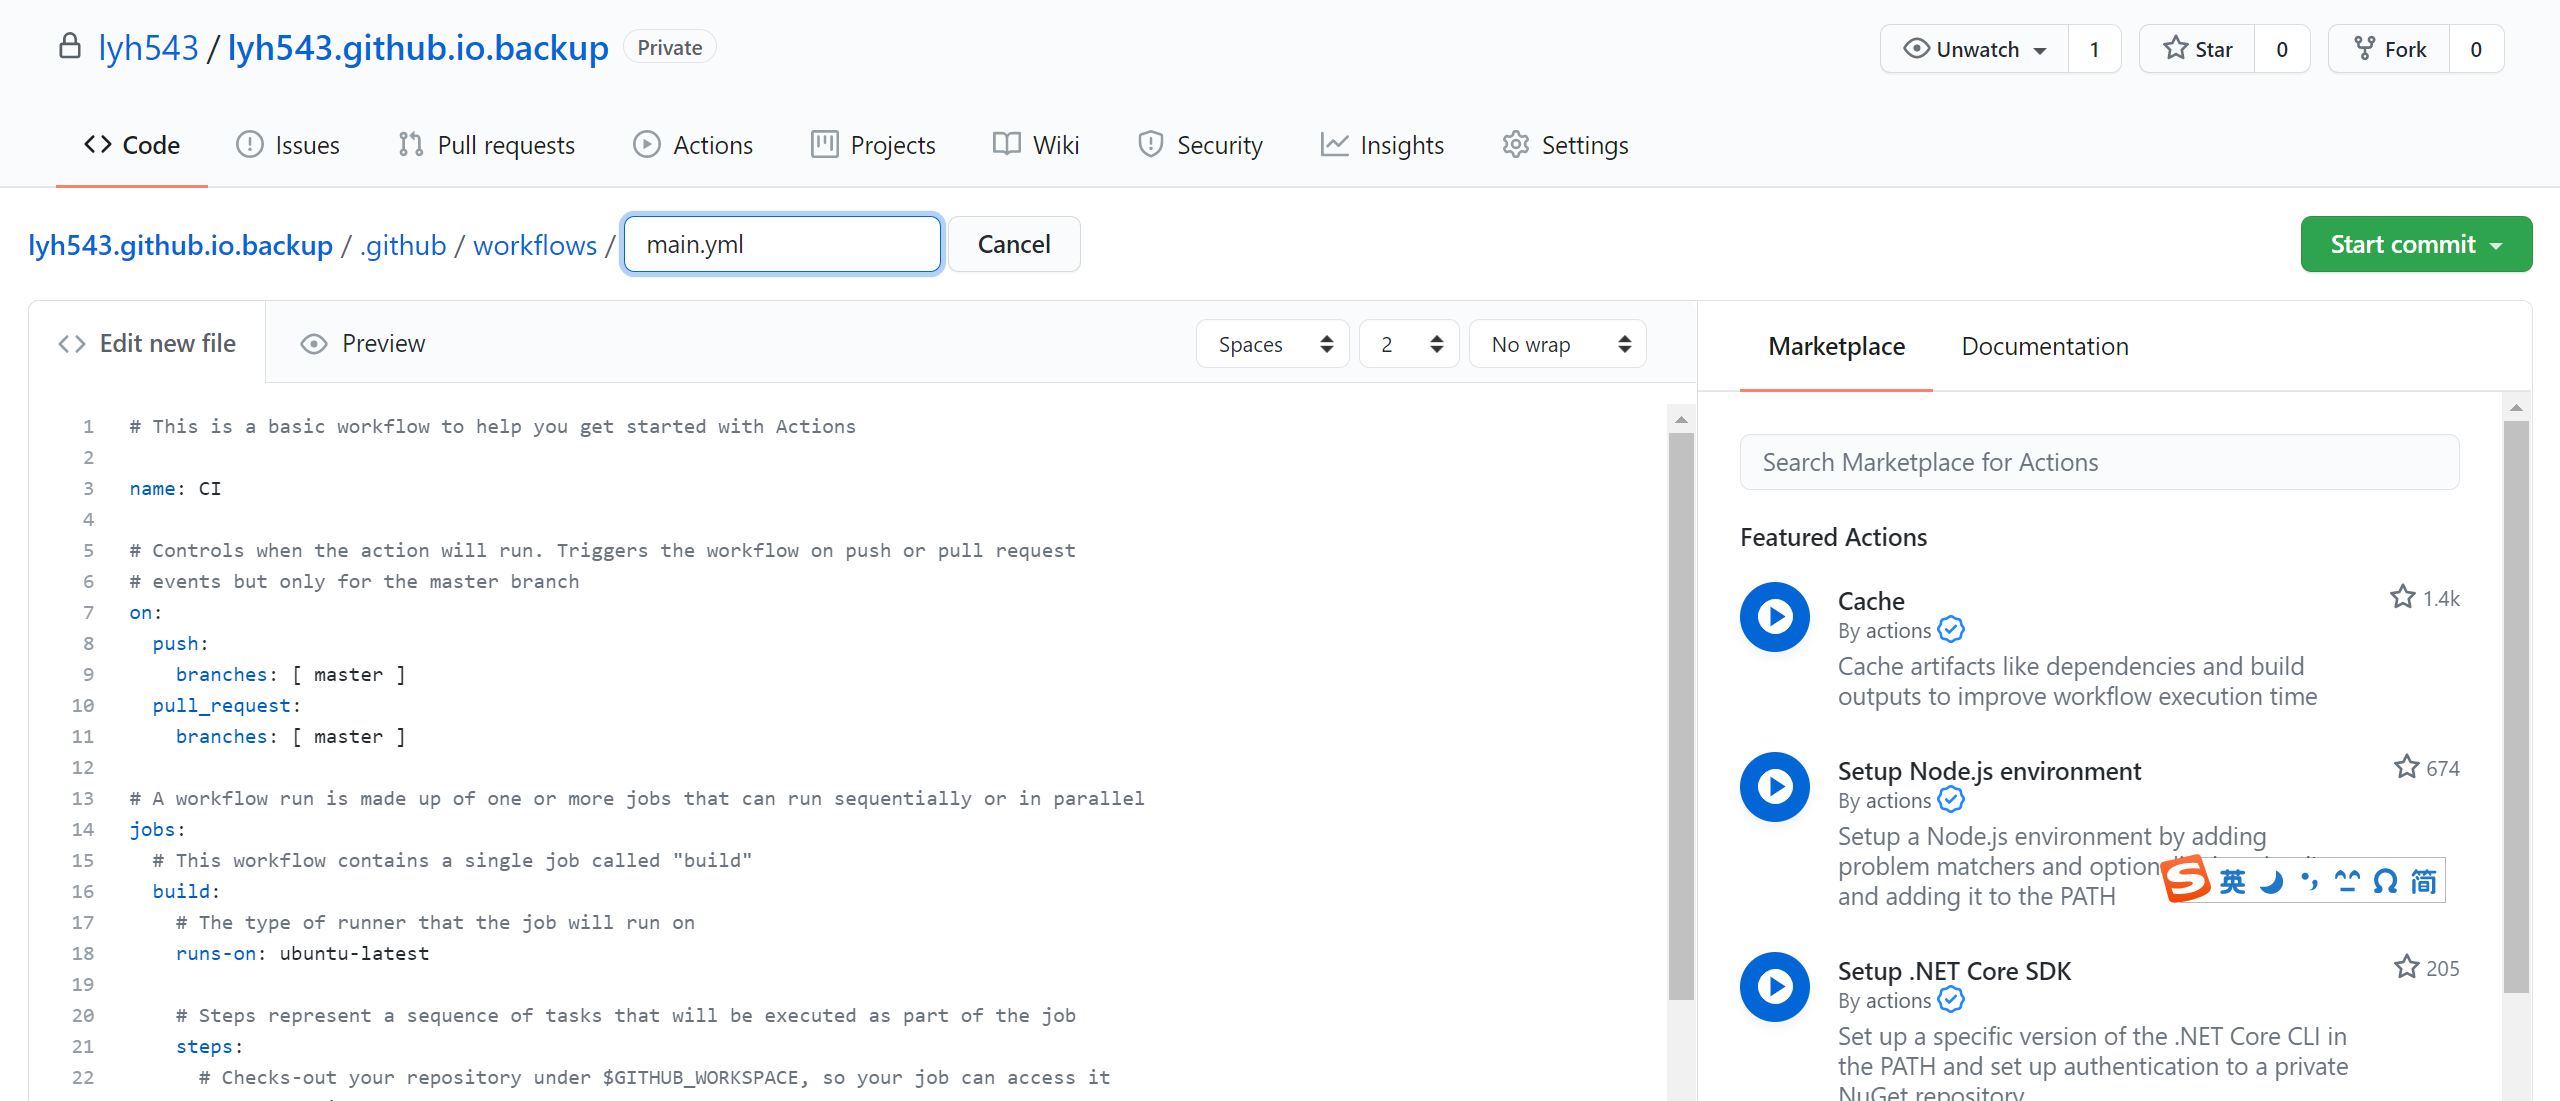
直接将配置复制覆盖左边的编辑框的内容即可。名称可自取。然后在本地 git pull

之后就可以在 GitHub Actions 看到这次部署了。

GitHub Actions
GitHub Actions