public User getByEmail(String email){ return userMapper.getByEmail(email); }
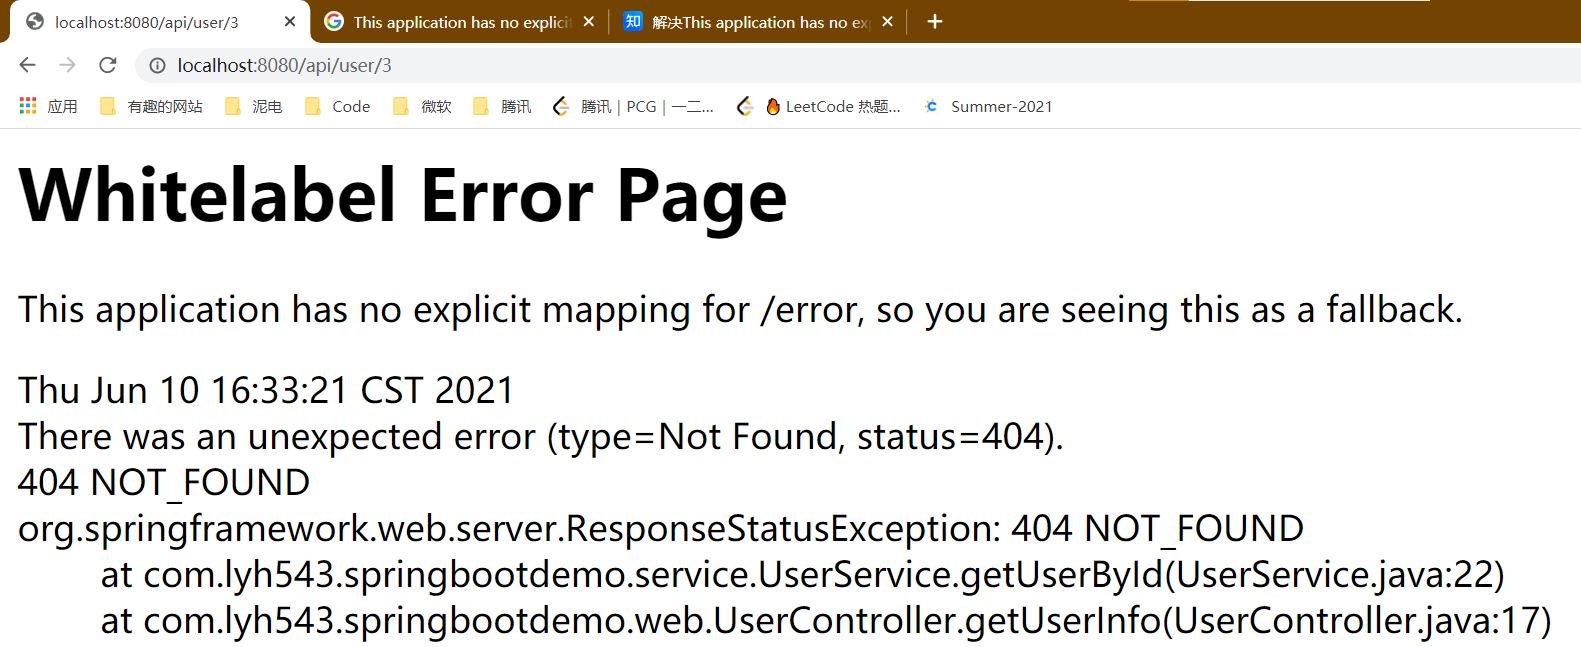
public User getUserById(int id){ User user = userMapper.getById(id); if (user == null) thrownew ResponseStatusException(HttpStatus.NOT_FOUND); return user; } }
httpie 如果没有加 =,就是 GET 方法;如果加了 id=1 或者单单一个的 =,那就是 POST 方法。
这个 url 只给了 PostMapping,所以 GET 方法被打回来了。
1 2 3 4 5 6 7 8 9 10 11 12 13 14 15
$ http localhost:8080/api/user id=1
HTTP/1.1 500
Connection: close
Content-Type: application/json
Date: Thu, 10 Jun 2021 09:25:48 GMT
Transfer-Encoding: chunked

{
    "error": "Internal Server Error",
    "message": "Type definition error: [simple type, class com.lyh543.springbootdemo.entity.User]; nested exception is com.fasterxml.jackson.databind.exc.InvalidDefinitionException: Cannot construct instance of `com.lyh543.springbootdemo.entity.User` (no Creators, like default constructor, exist): cannot deserialize from Object value (no delegate- or property-based Creator)\n at [Source: (PushbackInputStream); line: 1, column: 2]",
    "path": "/api/user",
    "status": 500,
    "timestamp": "2021-06-10T09:25:48.338+00:00",
    "trace": "org.springframework.http.converter.HttpMessageConversionException"
}
// src/main/java/com/lyh543/springbootdemo/service/UserService.java @Service publicclassUserService{ public User createUser(User user){ userMapper.insert(user); return user; } }
// src/main/java/com/lyh543/springbootdemo/web/UserController.java @RestController publicclassUserController{ @PostMapping("/api/user") public User createUser(@RequestBody User user){ return userService.createUser(user); } }
@PostMapping("/api/user") public User createUser(@RequestBody User user, HttpServletResponse response){ response.setStatus(HttpStatus.CREATED.value()); return userService.createUser(user); }
@PostMapping("/api/user") public User createUser(@RequestBody User user){ response.setStatus(HttpStatus.CREATED.value()); return userService.createUser(user); } }